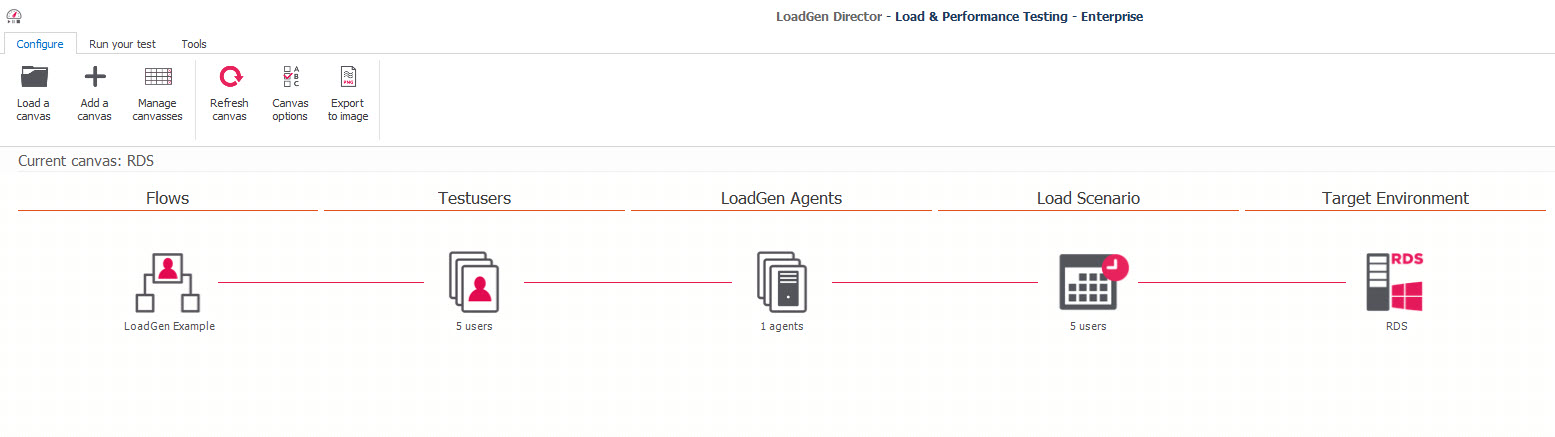
In LoadGen Load & Performance Testing, you are able to change the Load Scenario when double-clicking on the Load Scenario icon and going to the tab page Load Scenario. Here you will see an overview of already created Load Scenarios. Select the Load Scenario you want to use with your current test or click on Manage to add or edit a Load Scenario.

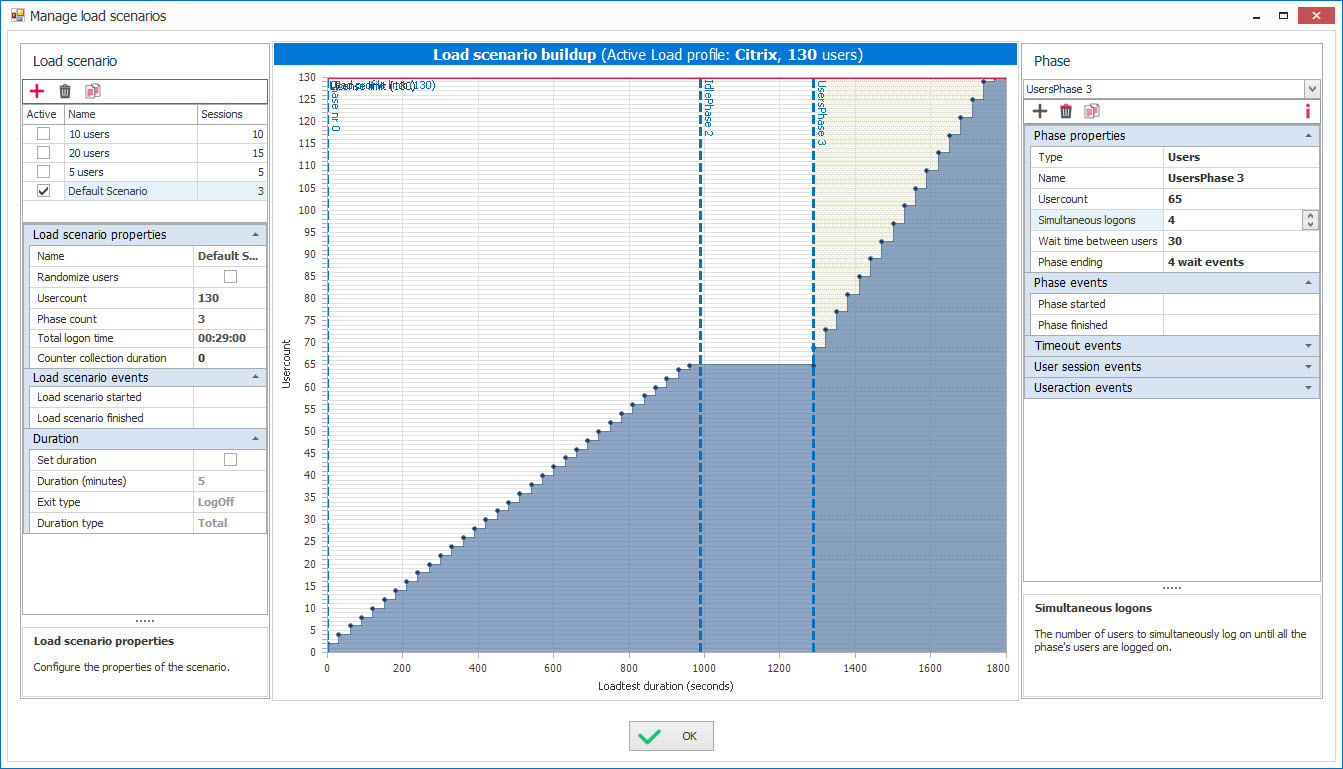
When clicking on Manage a new window will open. The Manage load scenario window is divided into 3 sections:
- Load scenario on the left.
- Load scenario buildup in the middle.
-
Phase on the right.
Load scenario
The Load Scenario: here you can select what scenario you want to change, add a new scenario, or delete or copy the selected scenario.
When you have selected a Load Scenario you can see its corresponding properties, events, and duration. Use the icons to create, delete or duplicate a Load Scenario.
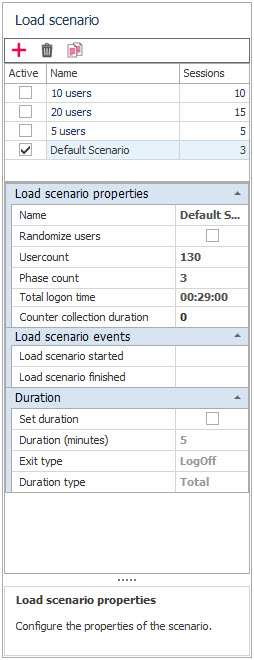
When you have selected a Load Scenario you can see its corresponding properties, events, and duration. Use the

- Active: This property indicates whether the selected load scenario is currently active or not.
- Name: This property is where you set the name of your load scenario.
- Sessions: The 'Sessions' property is where you define the number of sessions that will be running concurrently in the load scenario.
- Default Scenario: This property can be set to mark the current scenario as the default one.
- Demo, Demo 2022, Demo Core, Demo Core - Windows: These are example names that you might give to different load scenarios that you create.
- Randomize users: This is a setting that, when enabled, randomizes the sequence of users that the load scenario will use.
- Usercount: This property is where you specify the total number of users that will be simulated in the load scenario. You can click on this property to change the number of users directly.
- Phase count: This property is where you specify the number of phases that your load scenario will go through.
- Total logon time: This property displays the total amount of time taken for all users to log on in the load scenario.
- Counter collection duration: This property lets you set the length of time over which performance counter data will be collected. The number of seconds that the Director will continue to collect performance counters after the users in this scenario have all finished.
-
Load scenario events: This section is where you can specify events that will be triggered at the start or end of the load scenario.
Load scenario events in LoadGen are used to automate certain tasks at the start or end of a load test. This could include things like collecting performance data, starting or stopping auxiliary services, or anything else that needs to happen when the load test begins or ends. These tasks are defined by the user and can involve executing scripts or invoking APIs.
The exact setup and usage of these events would depend on the specific requirements of the load test and the system under test. In general, these features are powerful tools for automating parts of the load-testing process, allowing for more comprehensive and accurate tests.
In this article, you can read how to start collecting VMware ESX Performance Metrics when a load test starts. - Set duration: This is the action to set the duration of the load scenario.
- Duration (minutes): This property is where you specify the duration of the load scenario in minutes.
- Exit type: This property is where you specify the manner in which the load scenario will end.
- Duration type: This property is where you specify the type of duration for the load scenario, such as total or per user.
Load scenario buildup
This is the visual overview of your Load Scenario. It is automatically generated when you change your settings in the phase section of the window.

Phase settings
In the Phase, you are able to change the phase properties, phase events, time-out events, user session events, and useraction events.
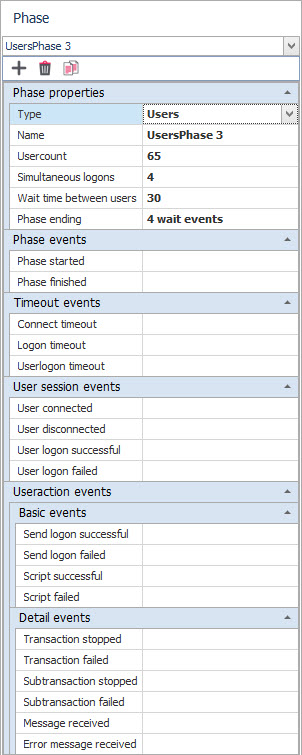

- Type: The stage of the load testing process, representing different user activities or system states. You have 2 types of phases User phase and the Idle phase. For the idle phase, you can set a duration of no logon time in your scenario.
- Name: The unique identifier given to a specific test, phase, or event.
- Usercount: The total number of user sessions initiated during the load test.
- Simultaneous logons: The number of user logins that occur at the same time during the load test.
- Wait time between us...: The time delay between initiating different user sessions or events during the load test.
- Phase ending: The event marking the end of a specific phase in the load test. Read more about phase-ending events in this article.
- Phase events: Specific activities or occurrences within a given phase of the load test.
- Phase started: The event marking the start of a specific phase in the load test.
- Phase finished: The event marking the completion of a specific phase in the load test.
- Timeout events: Events triggered when a certain operation in the load test exceeds the specified time limit.
- Connect timeout: The maximum time allowed for a user to establish a connection during the load test.
- Logon timeout: The maximum time allowed for a user to log on during the load test.
- Userlogon timeout: The maximum time allowed for a user session to start during the load test.
- User session events: Specific activities or occurrences within a user session during the load test.
- User connected: The event marking a successful user connection during the load test.
- User disconnected: The event marking the end of a user's connection during the load test.
- User logon successful: The event marking a successful user logon during the load test.
- User logon failed: The event marking a failed user logon attempt during the load test.
- Useraction events: Specific activities performed by a user during the load test.
- Send logon successful: The event marking a successful user logon submission during the load test.
- Send logon failed: The event marking a failed user logon submission during the load test.
- Script successful: The event marking the successful execution of a script during the load test.
- Script failed: The event marking a failed attempt to execute a script during the load test.
- Transaction stopped: The event marking the termination of a transaction during the load test.
- Transaction failed: The event marking a failed transaction during the load test.
- Subtransaction stop...: The event marking the termination of a subtransaction within a larger transaction during the load test.
- Subtransaction failed: The event marking a failed subtransaction within a larger transaction during the load test.
- Message received: The event marking the successful receipt of a message during the load test.
- Error message received: The event marking the receipt of an error message during the load test.
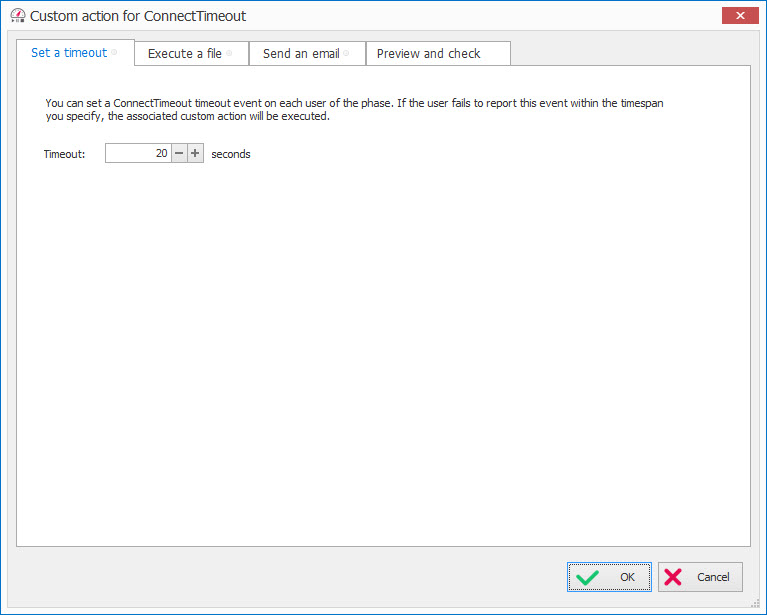
Custom actions
- For phase events, time-out events, user session events, and useraction events you are able to set Custom actions.
- There are 4 sections to Custom actions.
- Custom action Set a timeout: you can set a timeout event that if a user fails to report this event within the timespan you specify the associated custom action will be executed. Only available for timeout events.
-
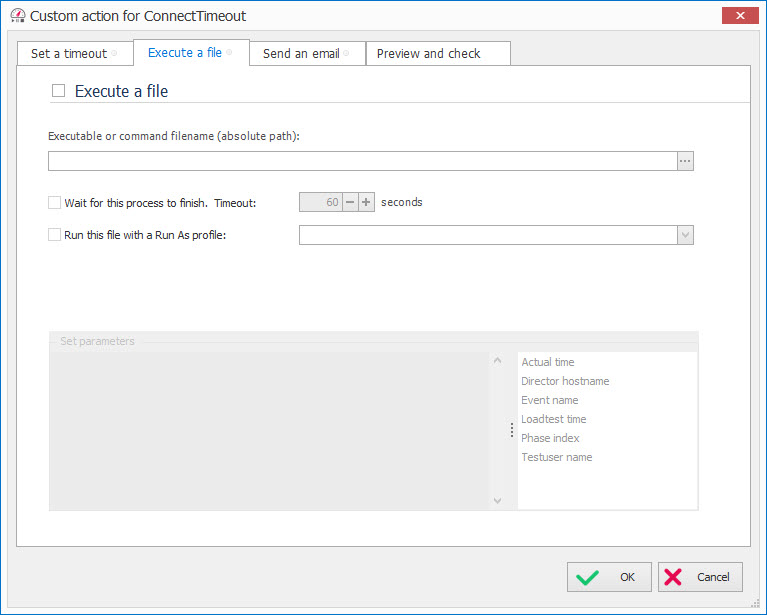
Execute a file: when an event fails you are able to send a custom action to execute a selected file.
-
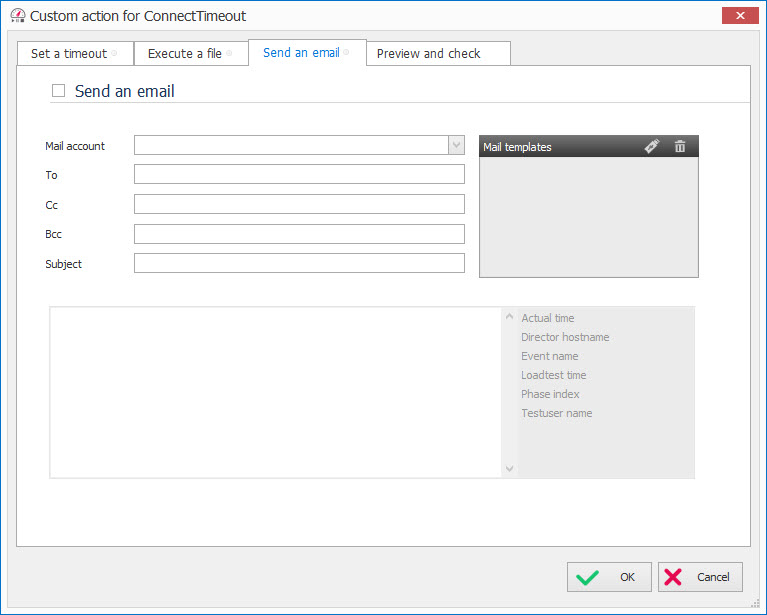
Send an email: when an event fails you are able to send a custom action to send an email that you have set.
- The final tab is a preview and check tab of what you have set in the previous tabs.
